First off, credit for this goes to this member of creative cow (all of six years ago): http://forums.creativecow.net/thread/61/857907#857910
Rendering a luminance depth (or z-depth) layer in mental ray so that it respects smooth mesh preview:
There are a number of ways to get a depth pass out of maya that I won't get into. I much prefer to use a separate render layer because it is so fast to (re-)render and you have much more control over the details, than if you use a render pass on a beauty layer. But the problem with using the luminance depth preset on a render layer is that it forces you to use Maya software, which doesn't respect smooth mesh preview, so your depth pass doesn't line up with your other passes (I'm referring to layers and passes interchangeably here). And if you switch to mental ray, the pre-built shader setup doesn't work when you batch render.
So, here is the shading network that will give you the exact same information as the luminance depth preset, but in mental ray.
1) Create each of these nodes and link them as follows:

a) samplerInfo.pointCamera > distanceBetween.point1
b) distanceBetween.distance > setRange.valueX
c) setRange.outValueX > Ramp.vCoord
d) Ramp.outColor > SurfaceShader.outColor
2) It doesn't look like it in the thumbnail, but the ramp should look like this (white on bottom, black on top)

3) And the final things are to change the Max value in the setRange to 1 (I think this might have been missed in the original thread). And change the Old min and Old max to the range you want the transition to be over. Use the distance tool to check the distance you want. You can key this as well, but it might be easier to do that in post, depending on the scene.
Update (28/08/2014): I have noticed that in some instances large world distance values don't work. Instead I have to divide the values by 10 or 100 to get a proper range. I suspect this has something to with camera coordinate space, which is what the samplerInfo is using, but I don't really understand it. Comments are welcome on this point.

4) And the actually real final thing is to put all your geo into a new render layer and give it a material override with this new surface shader.
5) And render.
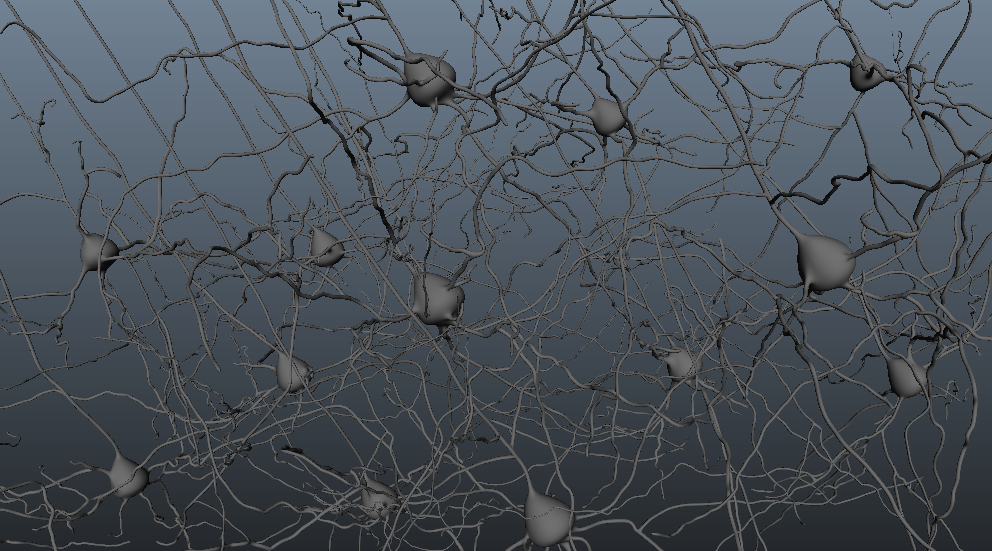
And this is the difference between maya software and mental ray.


There is still faceting in the mental ray, but in that case you have the control, instead of being limited to maya software render. Let me know in the comments if it works for you, or if I've missed something.
And my render is done, so I'll jump back to maya now.
Later,
Stuart
PS Okay, one last tip I'm experimenting with. nHair doesn't seem to work with this custom surface shader (there might be a way). The hair I want to be in the depth pass is darkish grey, so I've just added a directional light and increased the intensity until the hair renders at about the value I want. Nothing else is affected of course. Not super precise, but better than not including the hair in the depth pass. We'll see how it turns out.