Saturday, December 11, 2010

Portrait of a Boy

An acrylic painting I just finished at art lessons. It's an Indian boy from a portrait by Steve McCurry. Hope you like it.


Please click to view larger.

Later,
Stuart

Wednesday, December 1, 2010

The only hummers I ever want to see

Sorry about the lack of updates. I have been somewhat busy still. I completed a number of training kits and am working on drawing these days. And photography.

There's been a lot of activity at our hummingbird feeder the past few weeks as temperatures have dipped below the zero mark (that's Celsius, in case you're used to Foreign-height - *Oh snap!*). Crazy that these little critters can survive and flourish over the albeit generally mild winters here, when I typically think of them as almost tropical birds. So I decided to try to take some action photos. Standing on the balcony, I realized that there were at least 4 or 5 hummers that I could see or hear engaging in foraging, courting, nest scouting (?) and being territorial. It was quite the experience.


This first shot was entirely accidental. The shutter speed was obviously too high for the aperature to handle, and resulted in quite a nice sillhouette. The part I think I like best about it is that it's almost perfectly balanced in terms of sillhouette and environment (reflection in feeder balancing the bird). Again, it was a swivel and click moment, but I was pleasantly suprised for once.


The next one was a bit more carefully planned; I put up the flash (which I usually don't like, but I think it works alright) and managed to get him as he went for the sugary goodness. I also got a few pics of the birds on branches, but they were never close enough to get a good shot with my max length of 55mm. But... I got my new 50mm f/1.4 today! Gonna try it out now. (Yes, I realize that's not longer, that's not what I meant).

I'll try to post up a sketch or two in the next while. I figure December will be crazy, so if you don't see any updates for a while, hopefully you understand.

Later,
Stuart

Sunday, November 21, 2010

Apples and Appendicitis

Just a short update on why I haven't updated my blog. Came down with a brief spot of appendicitis a couple weeks back. Didn't get diagnosed right away, so I was out of sorts for a bit before having surgery and then I've been recovering from the surgery itself too. So I haven't had energy to do much artwork.

Recently, now that I'm feeling a lot better, and slightly empty on my lower right side, I've been hankering to get back into things. My DT subscription runs out at the end of the month, and I'm not going to renew it for the time being. So I'm frantically plowing through tutorials before I no longer have access to them.

I've done a couple courses on After Effects, which was nice to get re-introduced to. I'll try to use it more after rendering out different passes. I also did an introduction to nDynamics, which is a different solver, or engine, if you will that Maya has, which is very cool and very powerful. I'll likely leave regular old dynamics behind in the face of this new wonderment. I also finished up a course on Digital Drawing, which was a little frustrating (it's a lot harder than on paper still), but quite helpful too. I won't post anything from these tutorials, since it's not original work and you could just go on the DT site to preview the stuff. Today I'm going to try to tackle nCloth and/or Fur, which are more modules of maya that I've barely even touched. This program is so ginormously huge, but I want to learn it all.

So that's pretty much an update. I've been missing art lessons while I was sick, but had one on Friday that was good fun. I'm painting a portrait of an (East) Indian boy. No idea how it will turn out, but I'll probably post up a photo of it when I'm done (too large for the scanner :) ). Also finished my November book (Monty Python Speaks! Heh heh).

Nothing to do with apples, just thought the title was catchier that way.
Stuart

Friday, October 29, 2010

Alien Final

I've spent some time adding some more skin detail as well as attempting to texture this beast. I spent a long time adding layer after layer of paint, hoping something would click. I didn't exactly stumble on something that really worked for me, but I'm reasonably satisfied with it, so I'm going to call it a successful experiment and move on to something else. Hope you like the final product. These aren't renders, just screen captures out of Mudbox. Can't truly render straight from Mudbox that I know of. You can do a few things like add depth of field, ambient occlusion, and lights, and I've played with that a bit.


I'd like to do some tutorials to really get a handle on the program, but I'm more comfortable with it now. I need to decide if I want to join the November competition over at DT. Looks like it'll be fun. I'm very tempted. Theme is fairy-tales... any suggestions?
Later,
Stuart

PS I did finish my October book. It was a really short one, basically a collection of letters between a sweet, obnoxious American customer and a British antique bookshop. 84 Charing Cross. The best part of the book was that it had honest-to-goodness bookworm holes through many of the pages.

Monday, October 25, 2010

Some photosketches

Okay, not really photosketches. More like here's a photo and here's also a couple of sketches. I wonder what photo sketches are. Probably sketches off photos, which I usually do, but these two are just from my head.

This was a sketch from some dystopian idea that was wandering around in my mind.

And since I'm learning faces in art lessons (from direct on POV) this was a sketch I did to see how much I could remember about how to do it and get some practice in. I see lots of problems with it, but I won't point them out because then you'll only see the problems.
And I also got outside on the weekend to take some photos. I decided I needed to put in at least one more solid effort with my kit lens before I go purchase a nice 50mm f/1.4.


...and needless to say, if you steal my images and/or sell them at an exorbitantly high price to black market customers, I'll hunt you down and waggle my finger in your general direction. For shame.

I also finally finished my "September" book, "This is Your Brain on Music" by Daniel Levitin. A really rich and fascinating book, covering lots of studies and thought-provoking topics. I'd recommend it, though it isn't a light read, at least not for me. Got to read an "October" book in 6 days or less.

Later,
Stuart

SimplyMaya Rain & Snow Dynamics

Once again I've had the privilege of reviewing Simply Maya tutorials. This time there are two short tutorials centered around creating some precipitation effects, namely rain and snow. Each of these is quite short, but at the end of each you've got a pretty nice dynamics effect. This tutorial was created with Maya 2011, but I had no problems following along with 2009.

In the rain tutorial, like the previous tutorial I reviewed, the instructor moves quickly, so the effect takes shape quickly. If you're new to Maya, the speed of the tutorial is such that you'll get confused and will have to play it through several times, but if you're familiar moving around Maya and you want to get introduced to dynamics, this is a fun little adventure. It explores surprisingly many different aspects and features of the dynamics module including the collision events editor (new to me, I think) and per particle attributes such as lifespan and color. There's some nice tips that get mentioned as well as an introduction to the expression editor which I think is essential for a good understanding and use of dynamics. Adding believability with forces is well done in this tutorial, although the time isn't taken to really explain how the fields and their attributes work with the particles (air is an ambiguous field to start out with, and I'm still a bit confused as to what it really does). Another minor complaint I might have that prevents it from being a really polished tutorial is that the instructor doesn't really mention resetting tools and preparing the scene when users may have changed options and settings previously. For example I believe the timeline should be set to "Play every frame" when testing dynamics, but I'm not 100% sure if that's critical. The rendering, specifically using the hardware renderer, doesn't get adequately described in my opinion, which is why you'll probably want to go through both tutorials.

The snow tutorial starts out in much the same way as the rain tutorial, and one might think it would redundant to go through both. It's true there's some repeated information, however, there is plenty of new material here, and I'd encourage people to cover both to get a full introduction to both dynamics and weather effects. The intro to using sprites is great, and what many dynamics tutorials don't do, and what this one does, is actually get into how to create sprites with transparency in photoshop. I really liked that this was included. Also, the instructor goes into much more detail on rendering with the hardware and preparing the effect for compositing.

Overall, a couple of really nice introductions to dynamics, and a great refresher for those already somewhat familiar with this module of Maya.

Friday, October 22, 2010

Green skin

Small update on the sculpt, I've added a bit of skin texture and a base layer of the skin color. I'll try to do a few layers of color to it to get some kind of skin believability. We'll see how it goes. I'm not really sure where this is headed, but it's fun to play around with it.


I'm going to try to get some kind of rough website up in the near future, which won't be pretty, but I'm thinking it will be good to have some sort of site, more than this blog, especially since I'm paying for space.

Later,
Stuart

Wednesday, October 13, 2010

Alien Sculpt Detailing

Started adding some details to the alien: veins and bone ridging. A bit unclear where it's going, lots of smooth expanse to add texture and detail to. It's a lot of fun to do on the occasion I have an idea what I'm doing.
Happy to hear comments and suggestions.


At the moment I'm watching a live stream of the chilean miner rescue; it's very cool to see. Hope they all make it okay.
Later,
Stuart

Monday, October 11, 2010

Alien Sculpt

Finally got motivated to spend some time working in Mudbox. I figured out how to get around some of the limitations of my tablet that were frustrating me (screen to tablet ratio and pressing the stylus buttons) and started messing around. I started with a basic human head shape that is supplied with Mudbox. While deep down inside I feel like that's cheating, I have to remind myself that it's better to produce something that wasn't quite down from scratch than to produce nothing. It's like using a cake mix to prevent starvation. Okay, not really.
I read an interesting article recently about perfectionism and procrastination that I really identified with. Basically it was saying that for fear of not getting it exactly right, one tends not to start it at all. That's the reason I don't have a website yet. But back to the sculpt, this is a WIP (i.e. it's nowhere near finished) of some kind of alien.


And a bit further along:

It's really fun, once I got past some of my mental and hardware obstacles. With sculpting, the best approach is to start with quite low resolution, and block out the basic shapes, then add resolution and start refining the shapes and adding other features. Then add more resolution and start including other details. Finally at the highest resolution, texture and blemishes are added in. The software allows you to jump back down to lower resolution versions to make larger scale changes (while stil retaining the detail), but the less I have to do that, the better the result I think.
Happy to hear your comments. If it looks like it's from some specific movie, it's not. Sorry if it looks like something from Star Trek or Star Wars or Mass Effect, this was just out of my head and seeing what my pen would produce. No reference or initial sketches, which is typically not a good idea, but this is more like doodling... getting familiar with the tools and practicing.

Wednesday, October 6, 2010

SimplyMaya Production Workflow Review

SimplyMaya has recently released a new Effects tutorial based on a Production Workflow for creating a simple dynamic simulation of golden rings bouncing out of a falling wineglass. I was given the privilege of reviewing the tutorial and writing up my thoughts on it. This was a fun, relatively short (1.5hr) training kit that walked through importing simple geometry, creating and baking a rigid body simulation, adding shaders and lights (including FG, IBL, and GI) and rendering out two layers (a beauty pass and a depth pass). The depth pass was used in After Effects to add an animated depth of field filter, resulting in quite a beautiful 6 second animation that showcases some of the exciting things Maya is capable of without a tremendous amount of effort. The final animation and tutorial can be viewed and purchased, respectively, here.

The video training includes scene files and final renders, which is nice, since I didn't take the time to render out my final piece, so I could use the supplied frames for the DOF section. Though the version of Maya used in the tutorial was 2011, I used 2009 and had practically no problems tracking with the latest release. I did run into some issue importing the wineglass geometry, but got around it without too much trouble. Perhaps including an obj for the wineglass would save some version incompatibilities. (Update: It looks like an obj will be added to the assets folder on my suggestion.)

The instructor moves reasonably quickly, though the pacing is such that following along is generally feasible and the instruction remains clear and concise. It is made clear that the scope of the training isn't to slog through info on every attribute that is modified in this tutorial, which is fair enough. I might have liked to get a bit more information on some of the rigid body attributes, since I wasn't completely satisified with my sim. The rings felt quite "floaty" at times, and I didn't know how to fix that, though to be honest, I didn't spend much time on my own tweaking all the attributes. In the same vein, the lighting and rendering section was more of a recipe to be followed than a how-to, but since this wasn't a lighting tutorial, I wasn't expecting anything else. The tutorial did cover many good points on dynamics and lighting/rendering and I was happy to see a pleasing result appear on my screen with relatively little time and effort. The instructor's approach and British sense of humour also made the video training fun and interesting for the duration.

The real strength of the tutorial was to bring the viewer's attention to a myriad of components and features that can be exploited in a thousand ways to bring added appeal to whatever project one might be working on. For example, I was practically unaware of the attribute spreadsheet, which seems essential for modifying the attributes in a large number of objects. I was also unfamiliar with mental ray's approximation editor, so while the tutorial didn't explore either of these in great depth, they are editors I am aware of now and will study up on. Exploring After Effects a bit more was also fun, and introduced to me the power of depth of field and how it can be easily used to add punch and polish to any animation. I'm definitely going to adopt this DOF workflow in my animations.

So in summary, while there could be more depth and detailed explanation in this worflow tutorial and a beginner might scramble to keep up, it really is an excellent overview of many topics and was very enjoyable to work through. I'd recommend this tutorial for any intermediate user who wants to stretch out beyond the typical modelling monotony and explore some of Maya's other offerings.

Stuart

Friday, October 1, 2010

About face

After a record low month of maya and posting, I've decided to abandon the skeleton project for the time being. There comes a point in some projects where the mental block of continuing the project prevents any forward motion in learning at all. Though I hate ditching projects, I need to get started on something less ambitious and more rewarding to get the momentum back up. In any case, the stuff I did for the project is not wasted. I made some reusable assets, learned a fair bit about organic modelling, and I can always continue from where I left off (potentially with a different end goal).

So looking ahead to this month, I have a few ideas and things happening. I started weekly art lessons, so that's really fun, and I'm looking forward to improving my drawing (and painting) skills as well as producing some portfolio pieces. I'm also going to be attending a photography seminar, where I'll be learning some digital workflow, flash techniques, and travel photography tips (for my Africa trip in the winter). I borrowed a human skull (not bone, casted I think, if that's a word) for this project, but I don't want to let it go to waste, so I'm going to set up a kind of skull-based still life like they did in renaissance paintings and do some drawings off a photo I'll take.

And as for maya, I'm getting close to the end of my year-long training subscription from DT, so I'm going to bash through some more tutorials while they're available. I also got introduced to yet another monthly competition based website (11secondclub.com) based on character animation. That's something I haven't really done much of before (I guess the robot sort of counts) so I'd like to take a crack at downloading a free rig and doing some animation.
Later,
Stuart

Sunday, September 12, 2010

Vanity

Well it's been quite a while, but I finally made some progress on my skeleton project. Unfortunately it wasn't actually part of the skeleton, but something is better than nothing. It's hard to get back into a project after a break. Here's the main piece of furniture for the room environment. Still have to add handles and make some refinements, but didn't take too long to throw it together. If you've been to my apartment, you might notice that this is basically my desk with a mirror on top.


I only have a bit more than a month left on this "competition" and even if I don't finish my initial plan, I want to get a finished animation out of it.

In non-CG life, I made short work of The Lost World for my August book, I read almost all of it in two or three days (yes, that's fast for me at this stage), so now I'm going to finish This is Your Brain on Music for my September book (I didn't actually read a book in August, Pilgrim's Regress took so long, so I'm sorta playing catchup).

Last weekend when I was on vacation, I got to play with my dad's pro macro lens, which was lots of fun. I'm not very good at it yet, but I kinda liked this pic I got of a little spider. Five points if you can guess what substrate it was climbing over. Click for a bigger image - this is still cropped and resized from the original.


Hopefully updates will be more frequent in the coming weeks. Thanks for reading!
Stuart

Tuesday, August 31, 2010

Hack Job

Stretching back to that swordfight project, I finally finished a DT tutorial on mudbox sculpting. Still having a hard time using my tablet in mudbox, hand still cramping up and hover dragging still annoying. I downloaded a mudbox system packtch and it seems to be a bit more stable and functional now, but I've yet to be truly impressed. I managed to rush a messy job of the sword from the tutorial. I'll spend more time making better ones for the actual project. The only reason I'm posting it is cause I haven't posted anything in a while and so I can have an embarrassing reference when I get more proficient. This is a screen capture from mudbox.


And here is the corresponding maya render when the bump, color and specular maps are transferred to the original geometry...


Yeah, ew... but I know it can look better through much study and practice. I just have to work up the motivation to delve into this finicky business. I think the one problem topic I see most often on forums is transferring sculpt maps back into software for rendering... it seems a very uncooperative subject.

Anyway, I was hoping to use mudbox to sculpt and texture the bones I'm modelling for the horror competition. We'll see how that goes. I'll hopefully finish up another tutorial and get started on some more bones this week. Speaking of bones, I just started reading The Lost World by Michael Crichton. I've enjoyed Jurassic Park several times, but never got around to reading the sequel. It's pretty engaging so far.

Happy last week before school (if you go for that sort of thing),
Stuart

Friday, August 20, 2010

Starting some bones

I've gotten a start on my skeleton character.

Humerus, radius and ulna:


Lumbar vertebrae with wireframe and UVs:


These are just screen captures for now, still a fair bit of work to do on these bones yet, but I might start blocking out some more like the ribs and sternum. Having some trouble getting good references of all angles or turntables... or physical models... hmmm. Stay tuned for updates.
Stuart

Saturday, August 14, 2010

Car script

Last night I did a quick little script for someone on simplymaya that had a problem attaching many cars onto a single motion path. It might not be exactly what they needed, but I learned lots from this script. I learn more about scripting when I actually tackle a real problem, but the tutorials I've been watching have been very informative too.
Here's a screenshot:


I'm going to be starting on a horror character challenge in the next few days, which will give me an opportunity to incorporate some biology and medical animation I hope. Started storyboarding an idea, which I think will be lots of fun. Feeling a tad swamped with projects, but better than doing nothing, right?
Later,
Stuart

Monday, August 9, 2010

My Toy Competition Result

I won the July competition! I was pretty surprised to get the message, cause there were some really awesome entries, and 16 entries in total. You should check out some of the other ones, cause there's a lot of great stuff, including a Chucky doll, some Technic, Mechano, Rock 'em Sock 'em Robots etc. I'll leave it to you if you think I deserved to win or not ;).

July2010-Contest-Winner!

Thanks everyone for keeping up with my progress and commenting. Right now I'm doing some scripting and drawing tutorials, so the blog will be a bit slow, but come Saturday, I'm going to be starting a new challenge (on SimplyMaya this time). I've got a cool concept all up in my head (foreshadowing). Looking forward to it.

If you're wondering why I keep entering competitions, it's not that I'm looking for prizes or recognition, but challenges like these push you toward a defined goal, force you to present your best, give you constructive criticism from other members, challenge you to rise to the skills of others, result in a portfolio piece (with any luck), and are loads of fun. Enough said. The only real downside is that it really wraps you up in a single project for a period of time, but I guess that's just part of life, and it is good to be focused.

Later,
Stuart

Saturday, July 31, 2010

Bandit Ambush #6024

Well it's finished! Finally after many hours of messing with animation, render settings, and encoding presets (plus about 12-15 hours of actual rendering) I got a product I'm relatively pleased with.

http://vimeo.com/13793075

So.... check it out! And show it to your kid brother, who probably thinks that lego only comes in Star Wars and Harry Potter sets... c'mon kid...

And here's a frame (with signature, no extra charge):


No idea what's next. I'll have to either finish an existing project, work on some photography, do some tutorials, who knows? Oh yeah, and that community project is finally getting started (I think). Hope it doesn't end up dead in the water... no pun intended.

Tuesday, July 27, 2010

Two forest guys

And here's the other guy all textured up. And he stole the first guy's weapons.


I think I'll have time... animation tomorrow, rendering setup Friday, rendering overnight to Saturday, Saturday final assembly and upload. Fingers crossed :)

Later,
Stuart

Slightly painted forestman

Here's a shot at some texturing.


Not entirely happy with it yet. Looks a bit MS Paint, but then again, the lego up close looks a bit shoddy too. Haha. Anyway, gotta press forward and get the other guy done, then animate. Got kinda frustrated with the rendering this weekend; it takes quite a while to render out an image and then you need to tweak something and try again. I'm not experienced with it enough to figure out exactly what attributes change what, and where you can turn stuff on or not. And sometimes it's really hard to tell if something is turned on or not, so you have to really crank it up and then sometimes it still doesn't show up, so maybe a setting is wrong... and all that takes about 10 minutes for a couple back and forth cycles, and it still looks like poop.

But I digress. Less than a week to finish off my project... :S

Later,
Stuart

Friday, July 23, 2010

Canon Rebel T2i

I bought my first DSLR today! A Canon Rebel T2i, or 550D as it is otherwise known.
Hated having to wait for the battery to charge when I opened the packaging, why can't you just get up and go? But eventually it was done charging and I fired it up. Love it so far. Can't wait to learn more about getting the right exposure and messing with the aperature, shutter speed and all that. My previous camera was a lame-o Nikon Coolpix, where the most you could do was adjust the white balance and change the exposure level up or down a bit.

Things I like about it: 18 MP, 1080p 30fps full manual video recording (by full manual I mean you can change the aperature, shutter speed, iso, all that), proximity sensor for your face so the LCD turns off when you bring it to your eye, and a bunch of stuff I haven't played with yet.

Things I don't like: The expensive-ish SDHC card I bought isn't fast enough to handle the video. I guess I'll have to buy another one. Grrrrg. In case you're looking to get one for your T2i, don't get the SanDisk Ultra Class 4 16GB "15 MB/s" <-- majorly false advertising, it can't even break 5.5 MB/s writing apparently.

So I haven't updated my lego in a couple days cause I'm taking some time to learn a lot more about mental ray and rendering. I wasn't happy with my quick 3-point lighting render, and I'm totally getting schooled by a few other participants in the competition. I thought it would be best to buckle down and finally get to grips with Final Gather and Global Illumination among other things.

Happy Friday,
Stuart

PS I've added a couple elements to the blog on the recommendation of Google, so feel free to take advantage of the new sharing features (maybe share some previous lego posts instead of this one).

Tuesday, July 20, 2010

Assembly and a splash of color

Assembled the set this evening, which was quite fun. About as easy as a regular lego set, except you know for sure all the pieces are there. Still lots of work to make this look realistic, it looks very CG at the moment.

And as per tradition, the wireframes of all the pieces:


I'll either move on to a bit of assembly animation next, or finish up the minifigs (lego guys) with hats and textured faces, fronts and shield. This stage is nice cause I can switch back and forth between several modes, so when I get tired of animation, I can play around in Illustrator for a while. I'm going to use Illustrator to do the textures (and then export for rasterization) because I think I can get the nice clean lego lines that way, solid blocks and curves or color.

Oh yeah, and thanks everyone for getting my little counter past 1000 page views! Small milestones are good to celebrate. Of course most of that was probably me, but hey, still good. I added that somewheres in 2010, so don't think that's a comprehensive total. :)

Stay tuned for a potential video link one of these days..

Later,
Stuart

Monday, July 19, 2010

Weapons 2

So the rest of the weapons (and essentially all the modelling) done. Should be some color coming up any day now.

I need to figure out if I want to catalog all the pieces as separate data files so I can easily import whichever ones I need for any Lego project. Could make things nice and simple, but the overhead at this point might make it not worth it. Especially since it's getting a tad late in the month already... Yikes!

Hope you had a nice weekend; I had a really good one.
Stuart

Friday, July 16, 2010

Weapons 1

Haven't been at this for a couple days, but back into it again. Did the two pole based weapons (the easy ones). Fiiiive more pieces!


I'm now project manager for a sort of group project at Digital-Tutors, so that's taking up some time, doing organization and setup. The topic is "Fishing for a sea monster" and we're going to be doing a bunch (I hope) of concept sketches and character designs. I'll still try to focus on lego until the month is over of course, but that project will be coming down the pipes bit by bit.

Looking forward to the weekend,
Stuart

Tuesday, July 13, 2010

Through the fire and the treasure chest lid

So... guess what I modelled... no, you're wrong, it's not a ferrari, it's some lego!


Next up are the weapons, then some color hopefully, and a bit of putting it together. But I shouldn't get ahead of myself, still more modelling to do yet. The bow and arrow look tricky for one.

Happy Monday,
Stuart

Monday, July 12, 2010

A few more legos

And getting ever closer to that enviable assembly goal.


Some really fun pieces to make here... I quite enjoyed the "leaves" and the ladder. Hope you like 'em.
Later,
Stuart

Thursday, July 8, 2010

Some more pieces

Here's a few more. All the easy ones are already done... took a stab at the little flame piece, but couldn't get it. I'll try again tomorrow. These things look pretty easy, but it takes quite a bit of fiddling to get a clean mesh with all the holes and a few curves etc. I'll get faster with more practice.


Just did some googling... apparently this set is called "Bandit Ambush" #6024, and it's from the Dark Forest theme. Released in 1996.

Later,
Stuart

Tuesday, July 6, 2010

Some bricks

Here's some bricks that I made. Found measurements online and have been making them to spec (including the 0.1 mm tolerance for between bricks).


This is most of the pieces necessary for my forest set, except for all the hard stuff (ladder, treasure chest, weapons). That'll be fun too. Loving this so far... maybe that's why I love using Maya, it's a little bit like playing with Lego...

Monday, July 5, 2010

Microwaved Lego

Yeah, I know microwaves aren't UV, but I'm having a hard time with the post titles these days... "Groovy UV"?
Anyway, here he is all UVed. I've picked out the Lego set I'm going to do, a forest fort with a treasure chest.

I don't really know why I UVed the hands and arms and hips and the little bit of plastic inside the legs that they pivot on, as there will be no textures there. But it's all good practice, and it looks a bit nicer all checkered up.

So on the reading front... I finished Tarzan... which was completely different from all movies, TV, comic books. Yes, with a cliffhanger ending. Good thing there's 25 more books in the series. But I'm going to start Pilgrim's Regress by C.S. Lewis next. A bit more philosophical than Tarzan, which was quite a fun read. It's a response to the classic Pilgrim's Progress by John Bunyan, chronicling an allegorical character through life's trials. Should be interesting.
Hope you all have a good week,
Stuart

Friday, July 2, 2010

Leggo my lego

Started out on my entry for the DT competition. It's a legoman! My project will take a bit of a different tack from this point, so you'll have to wait and see how it goes. I did a three-point lighting setup for these two renders, a bit different from my usual ambient occlusion. It would probably look the best with a composite of occlusion and three-point lighting. I'll have to try that next time.
 Whenever you post a model on a maya forum, someone will go "wires, wires!" Well not quite like that, but it's good to see the wireframe on shaded model so that you can see how it was built, how high-poly, etc. This is the wireframe (on shaded) version of the unsmoothed model. The legs were the most complicated to do, with the hollow bottoms and holes in the back.

Stay tuned for the textured version! It's so good to have a long weekend. I get so much more done :)
Later,
Stuart

Saturday, June 26, 2010

Stagefright

This isn't quite my final image; there are some tweaks I'd like to do, but it's pretty close to it's final state, and I thought I'd share it. Happy to hear comments, critiques. I tried to incoporate the comments from my last harp images, including giving the curtain some thickness and randomness.

I'm entering the July competition for DT, which is to model, texture, and possibly animate a beloved child toy. It's a good way to get a portfolio image, because I'll have lots of good critique (I hope) from you guys and form the forum, and I'll have to be entirely happy with my submission. In between working on that, I'll be trying to get a portfolio level drawing done, and working on the swordfight sequence... just need a subject for a cool drawing... any ideas?

Later,
Stuart

Saturday, June 19, 2010

Oh look, a Stand

Second prop for the new and improved harp shot. This one is mostly nurbs too, but some of the complex bits, like the hinging back of the top part are polygons, converted from nurbs geometry.

Still gotta do the texturing and fix up the stage, add some sheet music. Might tweak the harp too, we'll see. It's missing a couple features right now.

The occlusion renders are pretty white, which I like, but I can tell it's maybe not the best way to show off the model, so I'll do some settings tweaking to see if I can't make it a bit more readable.

Later,
Stuart

Friday, June 18, 2010

Oh look, a Chair

Changing plans yet again again; this week I'm fixing up/polishing my harp scene so that it's something I would want to put in a portfolio. I'll get back to the swordfight, promise, but I gotta turn out a few still images first.
Here's a chair for the harp scene. Still need to do a music stand, some sheet music, and set the whole thing up.
This is all nurbs geometry, which I like for this sort of thing cause it has clean and simple lines.

Finished Dune (quite enjoyed it, though the ending felt somewhat ambiguous... good thing there's sequels) and started off Tarzan of the Apes (bit lower reading level I think, but pretty fun so far).

Later,
Stuart

Thursday, June 10, 2010

Competition Result

So it turns out I won the DT competition! Yay!
Thanks everyone for watching it and commenting!
I'll update on the current project next week, it happens to be my anniversary this weekend. Yes, the whole weekend. And Monday.
Stuart

Tuesday, June 8, 2010

Environment Sphere

On Saturday, I filmed a short little piece with my friend, (same co-director as Pixelmation), and we're going to try to add some fun special effects. I have no idea how well this will turn out, but it's an opportunity for me to learn some Photoshop, After Effects, Mudbox and Maya.

Won't give away any plot yet, but in order to create reflections off shiny CG elements, it's necessary to have an environment for them to reflect. So what we did is took a bunch of photos around his backyard and I stitched them together (with much warping and messy photo editing) to create this.
Then I created a sphere in maya, turned it inside out, and applied this as a texture:
What you're looking at is the inside of this sphere (the outside is transparent...) which will provide the environment that will be seen in the reflections of the CG swords. ...oops, did I say that? Didn't mean to.

Thanks for reading and looking,
Stuart

Saturday, June 5, 2010

Centennial

100 posts! Can't believe it. Nothing too memorable to mark it, besides uploading my whiplash animation to youtube, and this picture I drawed of a frog. You could have had it if you'd hired me.

Yes, I quoted a local radio commercial. Click for larger image. I used a creative commons photo as reference.

But here's the animation again: http://www.youtube.com/watch?v=yjr2HHgRviA
That's only if you're scared of vimeo or something... not to worry, the internet video content hosting monopoly is here to comfort you. Brought to you by the same company as this blog hosting monopoly.

So thanks everyone for commenting, good to hear what you like (or don't like). I'm going to start working on a still image for my next little project. My original plan was to finally edit my novel so that I could share it, but I really need to get a portfolio together, so I'm going to have to put it off a bit longer. Sorry to disappoint.

Stay tuned for the next 100 posts. I really hope they're better than the first.
Later,
Stuart

Monday, May 31, 2010

Whiplash!

Just uploaded my final animation to Vimeo.

Whiplash animation

Make sure to check it out in HD! Not that the extra pixels really add much, given the resolution of the geometry... but still. Hope you like it. Show it to your dog.

Later,
Stuart

Friday, May 28, 2010

Jumping balls!

Still getting the animation done, bit by bit. Taking a long time to do all the additions and refinements I want, but I'm confident it will get to a satisfactory point by Sunday night, if not to a point where I'm quite pleased with it.
Created a vimeo account, since that's required for the animation submission, but I'll probably post the final animation to both youtube and vimeo.
------>>> http://www.vimeo.com/12101149 <<<-------
And here's the graph editor to manipulate the curves that define how the objects are transformed through time. Basically a series of functions (time vs. value) one for each attribute that is modified, e.g. Translate in X, or Rotate around Y.

Stay tuned on Sunday for the final! (even if it's a disaster)
Later,
Stuart

Wednesday, May 26, 2010

Whiplash animation 2

Quick update: got all the blocking out down, added interpolation to everything and have refined the initial shot for the smaller, squishier ball. Looks half-decent so far, but I've got a long way to go to make it look how I want, nice and snappy. Still don't have a playblast, but that'll be next, once I fix all the points where the balls decide to wander gradually way over to their next mark before they're supposed to move. Here's a screenshot for one of the key moments. Not much emotional "tension" in it (no pun intended), I can see already. Have to work on it.

Other stuff: Found an excellent site for drawing poses, or life drawing as it's known. Here's the site: http://www.posemaniacs.com/ (Note: potentially NSFW, some skinless muscle-based nudity etc.) I particularly like the 30-second quick drawing tool, and the hands and feet section, cause I find hands and feet so hard to get right (not that I do that much character drawing). Well over half-way done Dune, but I don't think I'll get it done before end of May, especially since I need to focus on this. Listening to Metric - Fantasies. Cobian Backup is quite excellent. That's all.

Later,
Stuart

Monday, May 24, 2010

Whiplash animation

Still working on blocking out the animation for my whiplash animation. I think I need a longer attention span. At least, I find it relatively tedious in this stage of animation, blocking out the positions and timing for the two balls for the whole animation. The refining and tweaking to make it look good is a bit more enjoyable. Anyway, here's a screenshot of the process. I use ghosting to see where the control curves are at earlier and later keyframes to judge the motion arcs etc. Still kinda a noob at it though.

Just backing up my computer to that hard drive I installed yesterday. Hoping to do nightly backups now instead of weekly, where I had to remember to manually insert a hard drive into a dock when the backup was scheduled to run. Giving Cobain Backup a try, which seems to be doing the job relatively well. Still need to check out some of the options to achieve exactly what I want. In case you were interested in what my computer is doing at this very second... I know... fascinating. But remember folks, your data is only as good as your backup!

I also scanned some of my sketches, so I might upload a couple of those once I process them (e.g. crop, resize, rotate, adjust curves, touch-up). Hoping to get a bunch of sketching and animation done tomorrow.

Later,
Stuart

Saturday, May 22, 2010

Changing a Hard Drive

One of the things that must be done every now and again is diving into the guts of your computer to install a hard drive, change your graphics card, add some RAM, etc.
Of these, often the easiest is swapping out a hard drive. The front of the computer that holds the hard drive is usually quite accessible, the cables are obvious, and the parts are not as fragile. With this in mind, along with the generally accepted notion that Lian Li makes some of the best computer cases on the planet, I was optimistic when I decided to install another HDD into my beloved computer. In case you also have a Lian Li PC-P50 Black Aluminum ATX Mid Tower Case and want to attempt this, here is the step-by-step procedure.
1) Have on hand i) screwdrivers ii) alan wrench iii) scissors iv) vacuum v) motherboard manual vi) hard drive! vii) flashlight viii) spare HDD screws ix) spare SATA cable x) helper if available (to hold flashlight and hand parts)
2) Unscrew (thumb screws, easy) the two screws in the back of the case to pull off the side panel
3) Give the majorly dusty parts a quick vacuum, fans and vents, top of PSU
4) Check the hard drive mounts to assess the situation. There appears to be a cage of sorts within the bays that holds 3 hard drives. Two slots are full with SSD and HDD. The HDD must be installed within the cage, which requires the cage to be removed from the case. This is not the most elegant setup. However, we shall press on.
5) Remove the top of the case, pops off easy enough
6) Remove the front bevel of the case, also pops off
7) Remove the right side of the case (two more thumbscrews)
8) After examining both sides, it seems possible that the whole cage might slide out the front of the case if four key screws are removed. These also are thumbscrews, so it seems likely these are the main points of attack. Remove these screws.
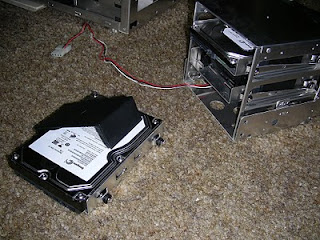
9) Remove three bottom vents in the front of the case, squeeze the sides and pull out to remove. (You can see them in the first image sitting on the top panel)
10) Give the cage a jiggle. It seems that it is now free of screws so it can be pulled it out.
11) Remove the sata cables from the two existing hard drives (not trivial, especially the 90 degree kind which allows no grip due to the power cable directly adjacent)
12) Remove the power cables from the hard drives (also not trivial, very tight, no room to maneuver, fragile components in the vicinity, very dark - try to aim flashlight by balancing on a nearby peripheral such as a scanner)
13) Give the cage a tug. Seems to be sliding free. Wait! Not quite. There is a power cable attached to the fan at the front of the cage. It is impossible to see how it is attached; reaching behind the cage and tugging cables does not work. Trace the thin wires up through the case. They are attached to another molex power cable. Detach at this point in the hope that this is not attached to any other components (not trivial, very tight and tucked behind zap-strapped group of cables). It becomes apparent that the wires are included in the zap-strapped group of power and sata cables.
15) Use scissors to snip the zap-strap (take care not to cut the cables) and pull the power wire down to the bottom of the case.
16) Pull the cage. At last it slides free.
17) Since the fan prevents the hard drives from sliding out the other direction, it is necessary to have the entire cage outside the case. Note that unscrewing the fan will not allow the hard drives to be exchanged, as will be seen shortly. Examine the cage to determine how the hard drives are mounted. Screws are puzzlingly disassociated from the existing hard drives. Tilting cage around provides little insight. Jiggling a hard drive provides the answer, they are connected merely through rubber grommets pinching thin metal rails. This provides significant noise reduction by not having metal on metal. Pull out one of the hard drive mounts to examine the method.

18) Hard drives are mounted with a screw on either side and a black plastic cover that snaps over the top of the drive. Unsure of purpose. Rearrange hard drive mounts so that SSD is on top. This allows better access to reconnect cables (Thinking ahead gives plenty of benefit in these situations, except in this case where it would have been better to have the SSD at the bottom... see below).

19) Place HDD in third mount, screw in two screws (rummage through spare parts bin if you don't have any on hand)
20) Snap cover over top. The HDD to be installed is a half-height variety, so the cover is useless and doesn't hold HDD in place at all, however screws seem to suffice.
21) Line up rubber grommets and slide HDD mounts back into cage.
22) Slide cage back into front of case, making sure to have fan power wires inserted first.
23) Connect up fan power cable with the molex. No zap-straps on hand, so the wires will have to dangle free. Does not appear to have an effect on air-flow, and increases ability to work inside case.
24) Check sata headers on your motherboard. Consult motherboard manual to determine how many are supposed to be on the board. It is quite likely they will be all used, so examine your bays to verify the fact and then decide which to unplug. In this case, a spare eSATA port is unecessary, so the internal SATA cable is disconnected. This particular cable cannot be removed, as it is integrated into the eSATA HDD bay, so put a twist-tie around it, and tuck it out of the way.
25) Connect up the cables from furthest in to closest to you. This is important for somewhat easier access. Start by connecting the spare sata cable to the motherboard header. Tricky in dim light.
 26) Connect the power cables to the hard drives, bottom to top. Snip another zap-strap to free up the power cable and determine how the power connectors line up to the hard drives. Start at the bottom with the one end of the cable. The second one gets an interior connector. The top is the SSD, where the connectors are recessed (difficult to access). Realize the next interior connector does not have room to reach the recessed connector. Unplug the power cables and start over.
27) Use the end connector for SSD, start with the first interior connector at the bottom. Make sure you are not trying to plug it in upside down, as this is the natural orientation if the end connector is to be connected at the top. Connect the next connector to the middle HDD, leaving space to loop the power cable back from the bottom directly to the top so the end connector can be connected to the SSD.
28) So much for the power cables. Connect up the three SATA cables to the hard drives. 90 degree sata connectors are more difficult, but make sure to use them on the HDDs, as they won't fit in the SSD. Use the flat sata for the SSD.
29) Take a break. Wipe sweat.
30) If you haven't already, replace the three vent pieces over the fan. They should snap into place. If they go too far in, use a very small alan wrench to pull them back out. Pushing the cage further into the case may be necessary if they don't fit.
31) Replace the thumbscrews on the cage, securing it in place, just behind the vents.
32) Replace front beveled panel of case
33) Replace top panel of case, always vacuuming where necessary
34) Replace right and left sides of case (four thumbscrews)
35) Reattach main power cable, power on
36) Check that all drives are recognized
37) Put away tools, garbage, manuals, parts, vacuum, etc.
38) Give yourself a pat on the back. You've survived the Lian Li hard drive cage match!

This should take you a little less than an hour to accomplish, or less now that the hang-ups and requirements have been so clearly described in the guide above.

May my hard drives live forever! (For I am loathe to ever replace them).

Just to contrast with another HDD mounting system I have done recently, this is the process.
1) Remove left side (two thumscrews).
2) Swing open front of case (pops open)
3) Open hard drive cage cover (two thumbscrews)
4) Attach spare rails to HDD (four screws)
5) Slide HDD into case until rails click into place
6) Connect sata cable and power cable (much more light and room)
7) Close HDD cage cover (two thumbscrews) and case front
8) Replace left side of case (two thumbscrews)

No animation today... I'm bushed. Sorry.
Stuart