 |
| Banner from SimplyMaya.com |
Right up front, the final verdict (cause the full
review is admittedly lengthy):
This modelling tutorial is well
structured and presented and, while not for beginners to Maya, is great
for people who are reasonably new to organic modelling. The vertex
tweaking and topology adjustments could have used more verbal
explanation, but the UV mapping sections were very helpful and
surprisingly painless.
A couple notes about software and
structure:
I completed this tutorial using Maya
2012 student version. The tutorial was created using Maya 2011,
however I suspect much earlier versions of Maya could handle this
tutorial no problem. There were few if any modelling tools or
commands used that are new additions to Maya, although the UI is a
bit different and may cause some confusion if you are following the
tutorial using Maya 2009 or earlier. There are now two other volumes
in the Surfing with the Alien series dealing with texturing,
detailing in zbrush, and rigging. This review just deals with the
first volume, i.e. modelling and UV mapping.
The tutorial is about 10 hrs long and
is split into 16 logically defined chapters, each 30-45 minutes long.
It includes image planes for the alien (but not the surfboard) along
with a scene file showing the final model posed on the surfboard. The
video files are quite sizable and the whole thing weighs in at over
2GB. Just something to keep in mind if you are bandwith limited.
And my thoughts on the tutorial:
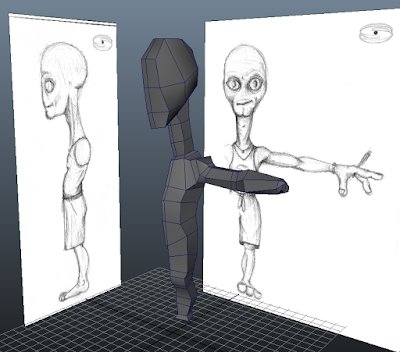
The tutorial starts off with setting up
image planes, which is good because knowing how to do this properly
shouldn't always be assumed. From there, things get moving fast. I
like to work on the project at the same time as the tutorial is
playing on my second monitor. My ideal situation would be to have to
pause the video rarely and rewind never. While I could almost keep up
in general, pausing on occasion, I have to start off by saying that
this tutorial is not meant
for people new to Maya, 3D, or modelling. Although the suggested level stated
on SimplyMaya.com is beginner, I think this is overly optimistic. Many tools
and commands are used without being introduced (wireframe and shaded modes,
extruding, inserting edge loops, split poly, working in the outliner
and channel box). Explaining these basics would be tedious for people familiar with modelling,
but would be necessary for a beginner. So if you don't yet
know the difference between insert edge loop and split poly, this
isn't the tutorial for you. (Note: In 2012 they've done some messing around with the split poly tool. I thought they'd changed it to “interactive split tool”, but it turns out
they've kept the original functionality and added more in the new interactive split tool – either tool will work fine for custom splitting).
Having said that,
for an intermediate user or someone who is comfortable at
hard-surface modelling and wants to give organics a try, this is a
great tutorial for that. The shapes are very roughly blocked out to
start, and Jay gives good advice and uses a variety of tools to work
efficiently and smoothly. Again, this progresses at a rapid pace, and
I think it would be nice to have the instructor stop every now and
again, take stock of what we have so far, what features the existing
edge loops will define, and how to expect them to evolve as the form
takes shape.
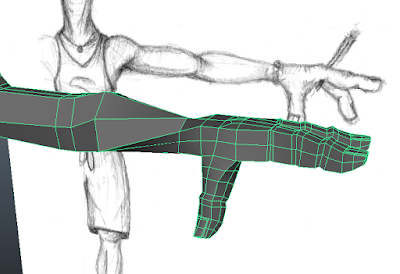
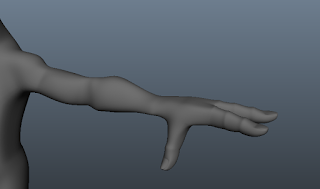
The fingers seemed
to take shape quickly and simply. The edge flow of the arm and hand is clear and
informative. After showing how to shape the thumb, Jay leaves the
viewer to finish shaping the other fingers. This makes sense,
however, it does mean that you shouldn't expect a final product in
the 10 hours it takes to view the tutorial. Even if you are able to
model and keep up while the tutorial is playing (which is it's own
challenge as I mentioned), some "homework" is required.
I should add a note
here about selecting modelling tools. Jay has a custom shelf that he
uses. If you aren't familiar with where the commonly used tools are,
a) maybe start with a more introductory tutorial, b) check the
mesh and edit mesh menus, c) check the maya docs, d) use the find menu
help tool, or e) ask the friendly folks over at
SimplyMaya.com. I
personally like to use marking menus to select common tools and
commands. Again, in different versions of Maya, Autodesk likes to
change the names of tools and menus, so either look in the docs, or
head over to simplymaya and ask politely.
Jay gives plenty of
good general advice on production quality models, common pitfalls,
things people tend to forget, and has a good sense of humor. He
doesn't gloss over errors, instead works through the troubleshooting and provides the solution, albeit sometimes without much
explanation.
The lack of explanation is probably my
main criticism of the tutorial. Since I work through at the same time
as the video is playing, I really appreciate a running commentary on
what is happening. This is present in large part, but often the
audio is limited to “we'll grab this and move it around here.”
Instead of "just move this there and give that a tweak"
I would prefer the instructor to give things names (preferably using
anotomical terms) or be a bit more specific about the verbal
instructions (e.g. we'll pull the bridge of the nose a bit further
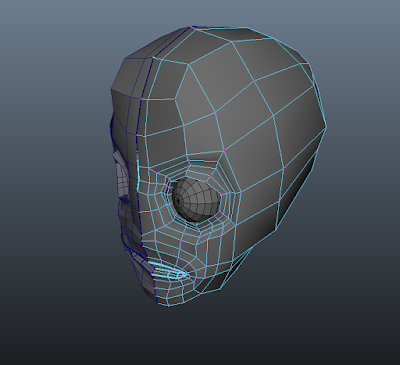
out, or we'll push back the corners of the mouth). The head
especially would benefit from that, because it was hard to anticipate
which edge loops would be pulled out from the face and which would be
pushed in to provide the desired contours. Even looking at the video,
it's often difficult to see exactly what is being selected, so
something like “grab the third innermost edge loop of the mouth”
would go a long way in my opinion. To be fair, the commentary is very
decent in places, but ideally, clear and anatomically based verbal
guidelines throughout each chapter would be excellent.

The
shaping sections get a bit tedious, being mostly vertex pushing, as
the author acknowledges. Of course you can fast forward some bits and
try to do the shaping on your own, however, I wouldn't recommend that
for myself at least, because I would struggle trying to deduce the
occasional topology adjustment and re-routing of edge loops that does
happen. In fact, it can be tricky to work out exactly how Jay is
modifying the topology, since my piece looked slightly different
based on how I tweaked the vertices, and sometimes it's necessary to
stop and puzzle out independently how to get the same topology.
Jay sometimes uses
a custom script called spin-faces. You can find this on
creativecrash.com, or do it manually which shouldn't be hard.
However, in Maya 2012 there is now “spin edge forward” and “spin
edge backward” under the edit mesh menu which does the same thing
(just select the edge to rotate instead of the faces as Jay does).
After the alien was
complete, it was fun to create some accessories, including clothes,
jewellery, and a surfboard. Some different modelling techniques are
introduced, including creative use of some non-linear deformers.
Unfortunately the surfboard image planes don't seem to be included in
the supplied files, but since the object is pretty simple, I didn't
struggle with not having the reference (yes, it was part of the tutorial to put fins on top of the sufboard too; it is an alien after all).
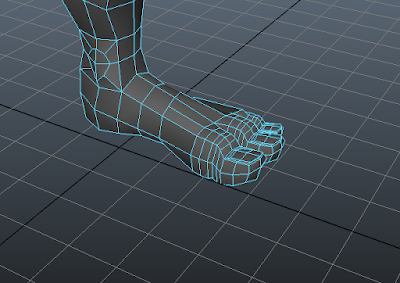
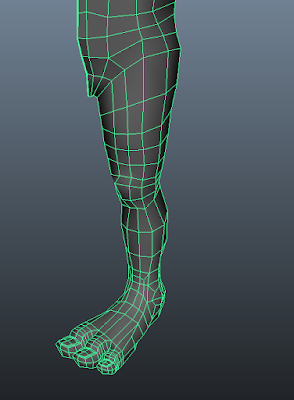
The UV
mapping for me was a highlight of the tutorial. UVing gets a bad rap,
but under Jay's direction, it's not as tedious as you'd expect. Jay
goes over helpful troubleshooting tips and solutions and
workflow improvements. Like modelling the fingers, Jay leaves it to
the viewer to UV the legs and feet since it's the same process as
arms and legs.
There seems to be a bug near the end of part 15 where the audio continues but the video quits. I've
contacted an admin at Simply Maya, and if it's not a problem on my
computer's end, I'm sure it will get sorted out in no time. I've
always had great success with the people over at Simply Maya.
Though there were
times while following the tutorial that were frustrating or tedious
and ultimately I wasn't that happy with how my alien's face turned
out (it's my fault that it's kinda noobish looking), often I was reminded how fun it is to model in Maya, and I'm rather pleased with the final
product as a whole. I'd recommend this tutorial to any intermediate
modeller as excellent project-based training for organic modelling.
Thanks to Jay and
Simply Maya!
P.P.S. (Personal Plug Script) If you're visiting from Simply Maya, welcome to my blog! I hope you stick around and check out some of my personal and biomedical projects.


