Showing posts with label Computer. Show all posts

Friday, February 22, 2019

Ripping threads: a new workstation

Before we get started, if you'd rather see the super short version with mostly just pictures, check out my Instagram profile instead. Okay, on with the post. I recently purchased and assembled a new PC! Reason 1: My previous home workstation was purchased a little over 9 years ago. Reason 2: I'll be making computer animations that are fairly demanding with respect to computer hardware.

Yes, it was past time for me to build a new computer. Over the years, I have made some additions and replacements here and there to my old machine; I chronicled one such upgrade in this tongue-in-cheek blog post. However the core of my old computer has been a constant and stalwart workhorse and has enabled me to apply to, complete, and make use of a Master's of Science in Biomedical Communication. It's a bittersweet parting.

Part of the reason (beyond the expense) it took so long to upgrade is because purchasing a computer comes with so many decisions: Windows, Mac, or Linux? Laptop or desktop? Pre-assembled or self-assembled? Intel or AMD? NVidia or AMD? Water-cooled or air-cooled? How much RAM? Everything fits in the case, yes? How about that Samsung NVMe boot drive: Pro or Evo? And do you really need a USB type C port on the front of the case? No, but calculus involving shipping times, availability, cost, colors, side panels, so yes I have one. The list is nigh endless.

I'm not going to discuss pros and cons or rationalize all the decisions I made. I am confident that I did sufficient research and made decisions that were right for me, which are not going to be the choices that anyone else should necessarily make. I try hard not to be a fanboy for any company (I'll admit my chief failing in this regard is Redshift3D). I don't think brand loyalty is worth very much for consumers of hardware, though it's worth a tremendous amount for companies. Food for thought.

So (five paragraphs in), let's cut to the good stuff. All the components arrived in exciting boxes. The case shipped later, so I opted to assemble the guts outside the case in the meantime to make sure I didn't have any dead components.
Like Christmas morning
I cleared off my desk (it's never this tidy), stole my wife's MacBook for on-the-fly support and troubleshooting, and grabbed my iFixit toolkit (a worthwhile birthday splurge).
The streetcar print was a secret santa gift. I love it/hate it.
I grounded myself with an anti-static wrist strap (not pictured) and placed the ROG Strix x399-E motherboard on its box to use as a non-zapping workbench.
It's convenient that so much gaming hardware is perfectly functional for workstations.
Then it was time to install the CPU. I chose the AMD Threadripper 2920x, with 12 cores, 24 threads, 3.5GHz base clock, and this post's namesake. For me it's a good balance of single- and multi-threaded performance and price. Screwing it down was a sweat-inducing nightmare though. I had to press hard way beyond comfort to get the tiny screws to catch. Installing the 64GB of Corsair RAM was comparatively easy, with 4 empty slots for adding more in the future. Yes, I use a lot of RAM hungry applications. There's simply never enough.
This smallish piece of silicon came in the most dramatic packaging I've ever opened.
Next is the "hard drive". In this case it's a tiny (half-terabyte) stick of non-volatile flash memory. Computer technology has come so far. The Samsung 970 series of NVMe SSDs is a very popular choice. I'm using this to hold my operating system (Windows 10 Pro) and all my applications (too many to list, sorry not sorry).
I broke one of the stand-off posts, I think. Ah well, not critical I'm sur&#,%20&..#^@.......
I stuck with air-cooling for this build; I'm not quite convinced of the merits of water-cooling (even AIOs) just yet. Noctua has built great coolers for me in the past, and this giant hunk of metal looks to be another excellent cooler. I meticulously followed the thermal paste application guidelines; indeed I measured out and drew reference circles on that piece of paper in the image, to verify my pea-sized dots of paste.
Fans are available in beige and brown. No, beige AND brown.
As mentioned previously, I'm using a GPU render engine called Redshift to create my images, so a decently powerful NVidia graphics card is a must. This one is the RTX 2070, and I also added the GTX 970 from my old computer (not pictured).
Blower-style. That's not a joke, that's what it is.
I have to power all those components somehow! I wanted high efficiency and enough headroom to potentially add more graphics cards in the future, so the Corsair HX-1000 (1000W) seemed a good reliable choice.
The computer component most likely to explode, kill you, catch on fire, or all of the above. Buy reliable.
And… with held-breath, I poked the start button. And lights came on! And fans spun! And the BIOS showed up on my monitor! I checked a few things, flashed the BIOS to the most recent version so that my processor was properly supported, and shut it down again.
The CPU fan started and stopped a bunch and freaked me out.
Cut to a few days later when my case arrived. Actually it got dropped at a postal outlet many blocks away so I lugged it home in the snow because I'm cheap and don't like taxis and don't have Uber/Lyft and whatever. And exercise is good. The Fractal Design Define R6 Blackout without side-window with USB-C top panel (there are a lot of different configurations) was my choice of case and I'm pleased with it. It's a very understated and quiet black metal box. One would hardly know there's anything happening under my desk right now.
It's bigger than it looks. But I didn't go crazy and get a Corsair 1000D.
I finished the assembly inside the case and made sure the system still booted. It did, yay!
If you see blue and red, your computer's not dead.
After installing and updating Windows, drivers, and some applications, I moved my hard drives from my old computer to the new system (2 SSDs and 2 HDDs) and did a bunch of cable management. I've been using this new machine for the past few weeks, getting everything installed and configured, and I must say I am very happy with the new system. I haven't pushed it too hard yet beyond some initial benchmarks and mini projects, so the biggest noticeable difference so far has simply been the noise. It is so much quieter than my old machine, it's hard to believe.

And that's it! I'll need to upgrade my monitors and mouse (circa 2007-2008) next, but that can wait another few months or years.

I hope with this post I struck the right balance of detailed enough but not boring. If you're down here instead of on Instagram, then perhaps it was okay. I'm happy to answer any and all questions via blog comments, Twitter, Instagram, Email (stuart at biocinematics d0t com), or wherever. You know: "Stuart, you simply must tell me, is your VRAM GDDR6 or HBM2???"

Teaser: My next post will the last one on this blog. What? Why? How? Wherefore? Come back next week!

Thank you for reading.
Stuart

Sunday, October 26, 2014

The music system

You may have noticed that my blog posts have been rather thin of late. If you haven't, well I'm terribly hurt you haven't been mashing refresh on a daily basis and sighing at the appearance of the post you've already seen 32 times. I have been working on a few things, but the one that has captured my attention most readily and frequently over the past few months has been the idea of a Raspberry Pi based music streaming system. Recently I've made enough progress that I thought I should share what I've been up to and how it's working out so far.

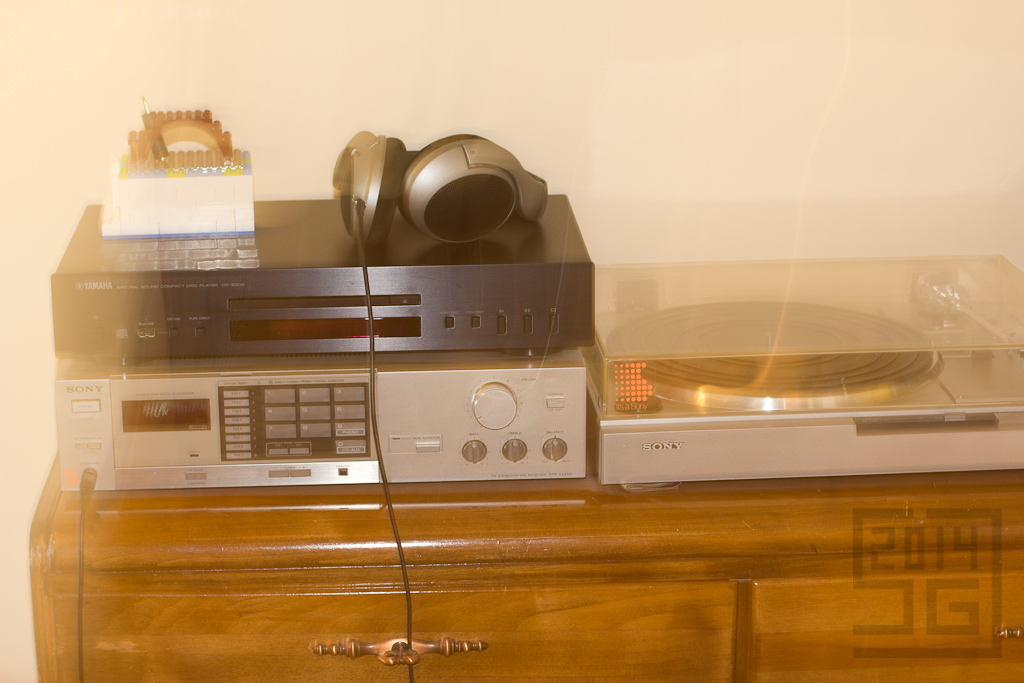
Here's my stereo system. The headphones I got first. I was immediately disappointed to find that I needed more components to really get the audio thing going. So next I got the turntable and receiver from a friend, (thanks Andrea!) and of course speakers. Later I got a CD player. I thought that was pretty good for a Hi-Fi system (incidentally the term WiFi is a play on HiFi, which doesn't make any sense to me... wireless fidelity?).

But what's this new white box on the CD player with a weird brown arch on it?


An aside: Please ignore the creative license in the photography. I was messing around and accidentally stumbled on what I think is a neat 70s film look. No? It looks like an amateur who doesn't know how to use on-camera flash? Fair enough.

Wait, hang on, this white box appears to be made of lego (a collective noun). And the brown stuff is a cleverly constructed headphone-adapter-holder and handle! Handle? Why yes...


The top comes off! And what's inside? Well, if you said a Raspberry Pi, then you are cheating because I told you at the beginning of the post and because you can't see the Raspberry Pi in the below image. What you can actually see is a digital to analog converter (DAC) by IQaudIO that is sitting on top of a Raspberry Pi B+.

At this point I suppose further explanation is in order. Raspberry Pi's are very small computers that are great for many projects like these. In this instance a Pi can be used with a custom operating system to play music. Here's how this works. I have ripped many of my CDs (as lossless FLAC files) to my network attached storage (essentially hard drives that I also use for backup). The Pi has a wireless dongle so it can access the NAS (pictured here) through the local network.

The operating system manages the music playback, queuing, and playlist creation etc. Then it sends the digital signal to the DAC which creates a beautiful analog signal for the receiver to amplify and send to the speakers. CD quality music (which, though a contentious topic, for my ears is as a good as it gets) is wonderfully reproduced. It is delightful to listen to and the Acrylonitrile Butadiene Styrene in the lego infuses a rich mellowness to the digital conversion. I brushed the base of it with olive oil and that has also made a tremendous impact on the midrange frequencies throughout the burn-in process. Okay, I seem to have gotten slightly off track in my subtle digs at certain constituents of the audiophile community.


Here's where it gets really fun. The OS in question is called RuneAudio and I can access the music player from any mobile device or computer. I've even generated a QR code for the URL used to access the webUI. This is not that critical, since it's a simple URL (http://runeaudio) but maybe friends coming over will get a kick out of scanning the printed QR code and choosing some music.


Note that this QR code won't work for you unless you either happen to be on my local network or also have a Rune Audio setup. The player looks like this on my phone.


Another fun thing I've done is to set up automatically downloaded podcasts on my NAS from specific RSS feeds so I can then play them on the stereo. It's also possible to stream audio (e.g. Rdio) from my computer to the Pi using TuneBlade. For Macs, the airplay protocol is built in so that works pretty seamlessly too.

So that's some stuff I've been getting setup recently. As can be imagined, not everything goes exactly according to plan, and I've had some hiccups with power supplies, wireless signals, etc. It's still very much a work in progress (next up are a 3D-printed case and an IR remote receiver), but I'm going to make an effort to ensure my other projects don't get too stalled.

Later,
Stuart

Saturday, May 22, 2010

Changing a Hard Drive

One of the things that must be done every now and again is diving into the guts of your computer to install a hard drive, change your graphics card, add some RAM, etc.
Of these, often the easiest is swapping out a hard drive. The front of the computer that holds the hard drive is usually quite accessible, the cables are obvious, and the parts are not as fragile. With this in mind, along with the generally accepted notion that Lian Li makes some of the best computer cases on the planet, I was optimistic when I decided to install another HDD into my beloved computer. In case you also have a Lian Li PC-P50 Black Aluminum ATX Mid Tower Case and want to attempt this, here is the step-by-step procedure.
1) Have on hand i) screwdrivers ii) alan wrench iii) scissors iv) vacuum v) motherboard manual vi) hard drive! vii) flashlight viii) spare HDD screws ix) spare SATA cable x) helper if available (to hold flashlight and hand parts)
2) Unscrew (thumb screws, easy) the two screws in the back of the case to pull off the side panel
3) Give the majorly dusty parts a quick vacuum, fans and vents, top of PSU
4) Check the hard drive mounts to assess the situation. There appears to be a cage of sorts within the bays that holds 3 hard drives. Two slots are full with SSD and HDD. The HDD must be installed within the cage, which requires the cage to be removed from the case. This is not the most elegant setup. However, we shall press on.
5) Remove the top of the case, pops off easy enough
6) Remove the front bevel of the case, also pops off
7) Remove the right side of the case (two more thumbscrews)
8) After examining both sides, it seems possible that the whole cage might slide out the front of the case if four key screws are removed. These also are thumbscrews, so it seems likely these are the main points of attack. Remove these screws.
9) Remove three bottom vents in the front of the case, squeeze the sides and pull out to remove. (You can see them in the first image sitting on the top panel)
10) Give the cage a jiggle. It seems that it is now free of screws so it can be pulled it out.
11) Remove the sata cables from the two existing hard drives (not trivial, especially the 90 degree kind which allows no grip due to the power cable directly adjacent)
12) Remove the power cables from the hard drives (also not trivial, very tight, no room to maneuver, fragile components in the vicinity, very dark - try to aim flashlight by balancing on a nearby peripheral such as a scanner)
13) Give the cage a tug. Seems to be sliding free. Wait! Not quite. There is a power cable attached to the fan at the front of the cage. It is impossible to see how it is attached; reaching behind the cage and tugging cables does not work. Trace the thin wires up through the case. They are attached to another molex power cable. Detach at this point in the hope that this is not attached to any other components (not trivial, very tight and tucked behind zap-strapped group of cables). It becomes apparent that the wires are included in the zap-strapped group of power and sata cables.
15) Use scissors to snip the zap-strap (take care not to cut the cables) and pull the power wire down to the bottom of the case.
16) Pull the cage. At last it slides free.
17) Since the fan prevents the hard drives from sliding out the other direction, it is necessary to have the entire cage outside the case. Note that unscrewing the fan will not allow the hard drives to be exchanged, as will be seen shortly. Examine the cage to determine how the hard drives are mounted. Screws are puzzlingly disassociated from the existing hard drives. Tilting cage around provides little insight. Jiggling a hard drive provides the answer, they are connected merely through rubber grommets pinching thin metal rails. This provides significant noise reduction by not having metal on metal. Pull out one of the hard drive mounts to examine the method.
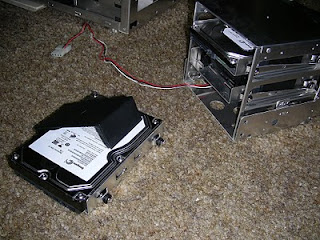
18) Hard drives are mounted with a screw on either side and a black plastic cover that snaps over the top of the drive. Unsure of purpose. Rearrange hard drive mounts so that SSD is on top. This allows better access to reconnect cables (Thinking ahead gives plenty of benefit in these situations, except in this case where it would have been better to have the SSD at the bottom... see below).

19) Place HDD in third mount, screw in two screws (rummage through spare parts bin if you don't have any on hand)
20) Snap cover over top. The HDD to be installed is a half-height variety, so the cover is useless and doesn't hold HDD in place at all, however screws seem to suffice.
21) Line up rubber grommets and slide HDD mounts back into cage.
22) Slide cage back into front of case, making sure to have fan power wires inserted first.
23) Connect up fan power cable with the molex. No zap-straps on hand, so the wires will have to dangle free. Does not appear to have an effect on air-flow, and increases ability to work inside case.
24) Check sata headers on your motherboard. Consult motherboard manual to determine how many are supposed to be on the board. It is quite likely they will be all used, so examine your bays to verify the fact and then decide which to unplug. In this case, a spare eSATA port is unecessary, so the internal SATA cable is disconnected. This particular cable cannot be removed, as it is integrated into the eSATA HDD bay, so put a twist-tie around it, and tuck it out of the way.
25) Connect up the cables from furthest in to closest to you. This is important for somewhat easier access. Start by connecting the spare sata cable to the motherboard header. Tricky in dim light.
 26) Connect the power cables to the hard drives, bottom to top. Snip another zap-strap to free up the power cable and determine how the power connectors line up to the hard drives. Start at the bottom with the one end of the cable. The second one gets an interior connector. The top is the SSD, where the connectors are recessed (difficult to access). Realize the next interior connector does not have room to reach the recessed connector. Unplug the power cables and start over.
27) Use the end connector for SSD, start with the first interior connector at the bottom. Make sure you are not trying to plug it in upside down, as this is the natural orientation if the end connector is to be connected at the top. Connect the next connector to the middle HDD, leaving space to loop the power cable back from the bottom directly to the top so the end connector can be connected to the SSD.
28) So much for the power cables. Connect up the three SATA cables to the hard drives. 90 degree sata connectors are more difficult, but make sure to use them on the HDDs, as they won't fit in the SSD. Use the flat sata for the SSD.
29) Take a break. Wipe sweat.
30) If you haven't already, replace the three vent pieces over the fan. They should snap into place. If they go too far in, use a very small alan wrench to pull them back out. Pushing the cage further into the case may be necessary if they don't fit.
31) Replace the thumbscrews on the cage, securing it in place, just behind the vents.
32) Replace front beveled panel of case
33) Replace top panel of case, always vacuuming where necessary
34) Replace right and left sides of case (four thumbscrews)
35) Reattach main power cable, power on
36) Check that all drives are recognized
37) Put away tools, garbage, manuals, parts, vacuum, etc.
38) Give yourself a pat on the back. You've survived the Lian Li hard drive cage match!

This should take you a little less than an hour to accomplish, or less now that the hang-ups and requirements have been so clearly described in the guide above.

May my hard drives live forever! (For I am loathe to ever replace them).

Just to contrast with another HDD mounting system I have done recently, this is the process.
1) Remove left side (two thumscrews).
2) Swing open front of case (pops open)
3) Open hard drive cage cover (two thumbscrews)
4) Attach spare rails to HDD (four screws)
5) Slide HDD into case until rails click into place
6) Connect sata cable and power cable (much more light and room)
7) Close HDD cage cover (two thumbscrews) and case front
8) Replace left side of case (two thumbscrews)

No animation today... I'm bushed. Sorry.
Stuart

Monday, September 28, 2009

Stop harpin' on the new computer!

Catchy title, eh? Ok, I guess not. Well, it's finally arrived. I've planning on buying it for almost a year, and now it's arrived, assembled, loaded up, installed, booted, and all that other stuff that computer's need to do before the real fun begins. Love the SSD, booting and loading apps is super fast. Maya (after it's been cached) starts in 8 seconds, which doesn't sound like much, but it's the difference between "yeah, I'll work on maya for a bit right now" and "meh... when I have time". Seriously. Windows 7 is installed, and... (sorry Mac and Linux fanboys) it rocks. I skipped Vista for obvious reasons, so it's all fresh and sparkly and snappy (boy is it snappy) and effectsy (which I typically don't like *cough* bouncing dock *cough*) but they're alright. I can tell the system noises will get tiring though. And... it's still windows, so far from perfection, but hey, it runs (most of) my software. I'll throw some Ubuntu on later as a secondary OS (yeah, sorry again Linux) and maybe a hackintosh someday??? (Keep the dream alive, fanboys!)

But I digress... I haven't really stressed the computer yet, but the initial playing around has been pretty sweet. Played Batman: Arkam Asylum for a little bit, great graphics and framerates (55+ fps! though w/o aa) and maya runs smooth as a rabbit's bum. (Deviated from the typical simile for the sensitive readers out there...) Well now, so I modelled a harp for the directed study I'm taking at UVic, and relatively pleased with the outcome. I think it's probably the best modelling I've done to date, though you can let me know if it still sucks. So there you go, the title made some sense. Blogalogalog.

And here's a WIP wireframe of some lever details:
That's my wife's harp in case you were wondering. I don't play. But it is a beautiful instrument. I'll be texturing it next, so stay tuned! (Despite the fact that this website doesn't broadcast on a specific frequency... or does it?!)

Later,
Stuart