The book is full of plants and animals similar yet dissimilar to those we are currently surrounded by. I wanted to capture a bit of mystery, a bit of familiarity, and a bit of softness and appealing texture. An image came to mind of an animal with a long curved tail, a back, and ears visible almost in silhouette. Perhaps someone else has done this and I subconsciously borrowed the idea, but I think it suits the feel of the novel. If you read the book, you'll know who the character is (
ZBrush is a great tool for messing around with ideas in digital clay, and dynamesh allows you to work without worrying about edge flow, poly counts, or anything technical.
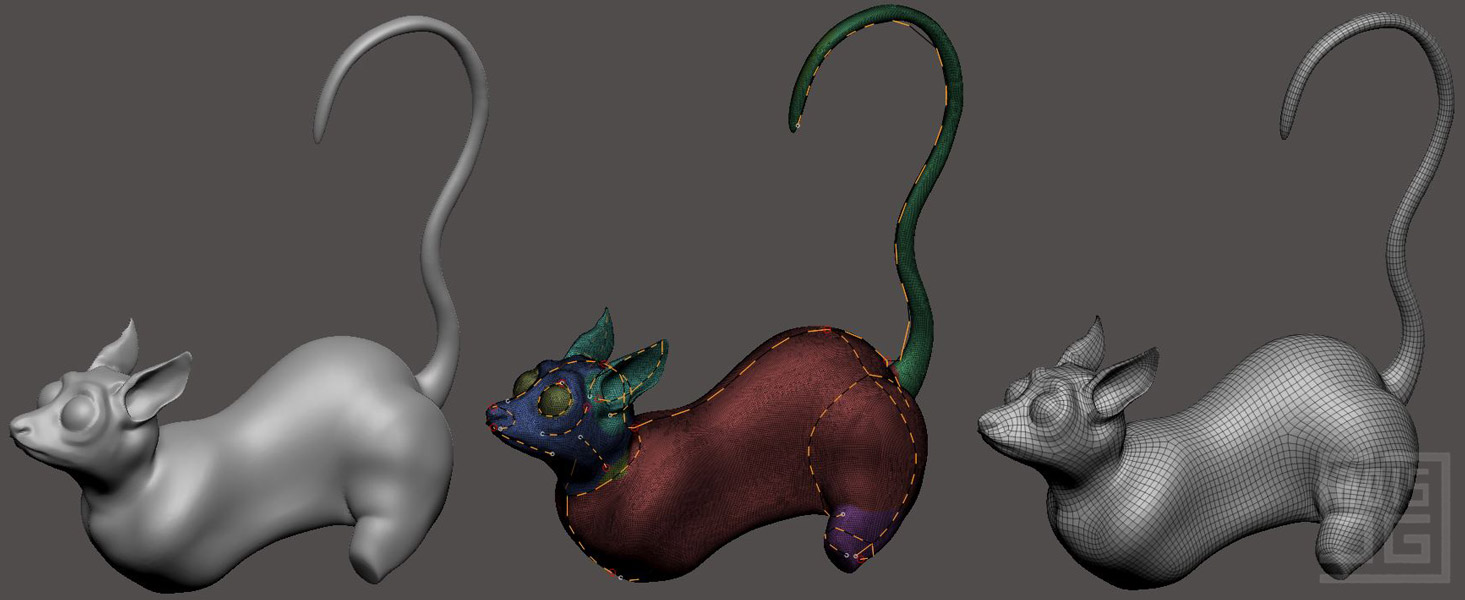
I sculpted out what I thought the hairless version should look like (left), then drew guides for the automatic retopology process (middle) after which I got a decent medium resolution mesh to work with in Maya (right).
I also painted a rough texture on the model in ZBrush, allowing it to be pretty loose and non-photorealistic because it would sit under the fur. It would also define the fur color. Then I unwrapped the UVs and exported the texture to photoshop.

I brought the model into Maya, connected the diffuse texture and set up the camera to match my working illustrator layout.

In order to get the fur on the animal, I had two options in Maya: xgen or the classic fur system. I tried working with xgen, because it is supposed to be the new workflow for fur, hair, and arbitrarily generated primitives (their words). Unfortunately it got the better of me, and I couldn't get colored workable fur. That was the point where I didn't get my cover out and published, and so began the move, the baby, and temporarily putting the project on hold.

More recently I returned to the project and began working with the classic fur system. One might expect that I started with the Racoon preset, but I actually started with the Calico Cat fur preset and did all the tweaks and changes from there.
 |
| Maya Fur Preset: Calico Cat |

The ears were the most frustrating part, and I created a whole separate fur system just for the rims of the ears. This meant painting even more grayscale maps, but I still found it more intuitive to work with than xgen.
 |
| Looks pretty ugly until render time |
In terms of lighting, I thought I would need something sophisticated and clever to highlight the fur, but it turns out I was quite happy with a pretty standard Physical Sun and Sky setup, though I made sure to turn off the automatic gamma correction (Linear Workflow all the way).
Once rendered, I did some post-processing in Photoshop. I performed color correction, cleaned up some of the fur manually, added a slight warm back-lit glow to the ear, and made a few other tweaks. Then I assembled it with the text in Illustrator. I used Playfair Display as the typeface and tried to keep the composition nice and simple.

Along the way, I made sure it looked good in grayscale, since many kindle readers are black and white (I mean the devices, not the people...). And that's pretty much it! Oh yeah... nudge: http://www.amazon.com/dp/B00XS2Y6QQ
Later!
Stuart
No comments:
Post a Comment