Thursday, January 17, 2013

RtIN - Monitor

Production for "Recording the Illuminated Neuron" has officially begun (well a couple weeks ago) and I've gotten something of a start on modelling. I've spent a bit of time working on getting a WIP rendering system set up so it's easy for me to render out and post WIP images. Still lots of opportunity to tweak the system but I'm happy with the results so far using sIBL from hdrlabs.com.

I haven't decided whether I will want to post renders without wires or with, most of the time. Here are two with wires on top and one without.


Later,
Stuart

Sunday, January 6, 2013

New year, new semester, treefrog

It's 2013 and I'm jumping back into the swing of things for the final semester of the program. How is that even possible? Everything is very much more scary this side of Christmas, but I'm really looking forward to it too.

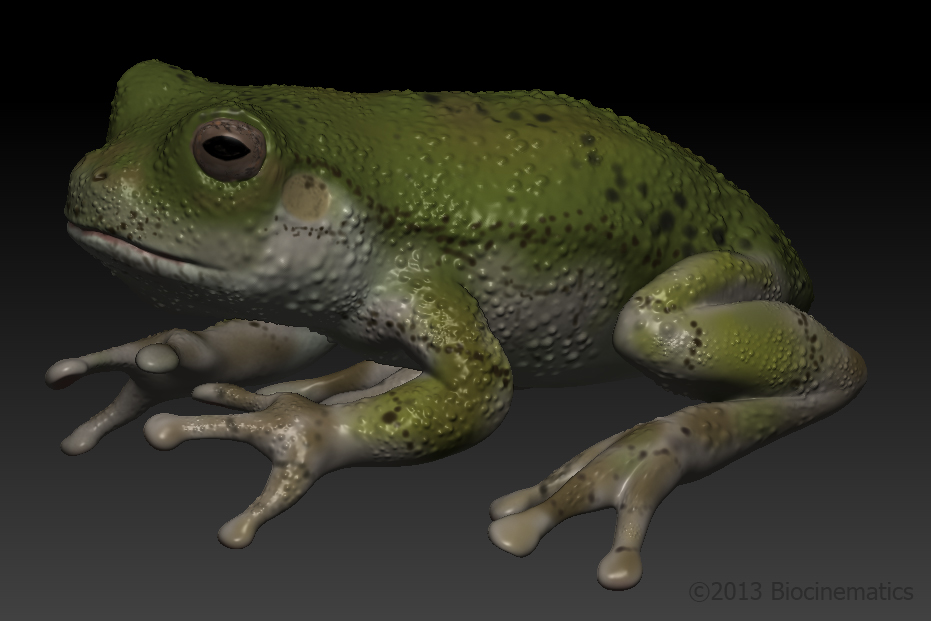
I made this treefrog in ZBrush (Hyla versicolor). It's a screenshot, not a proper render (I need to figure out how to do that in Z). I'd like to do more animal and nature scenes in 3D, so this was a small attempt to get into that a bit more. There's still so much to learn, it's rather overwhelming. But it's fun.


Happy New Year,
Stuart

P.S. I know I promised a Hobbit review before Christmas... but the plane landed before I'd written more than a paragraph, so I may or may not ever get round to finishing it. Sorry. Got to pick my battles.

Tuesday, December 11, 2012

MRP Animatic

As the semester comes to a close, I've decided to post my 2D animatic for the 3D animation in Maya I will be creating for my Master's Research Project. I suppose I still haven't explained my project so this is a good a chance as any.

DISCLAIMER: If you don't want to see my animation until its beautiful, 3D, final form, then don't watch the animatic. It's very visually rough, the narration is preliminary in my terrible voice, and everything is a spoiler for the final piece.

In February, I needed to start looking at selecting a project for my MRP, the main component of the MSc in Biomedical Communications I am pursuing. I saw a presentation on a very interesting new tool in neuroscience and chose it as the topic of study. The brief for this topic is to explain the function and usefulness of the newly developed probe to potentially interested parties, including researchers and graduate students. The "micro-optrode" represents the possibility for unprecedented (if I can use such a bold word) examination of individual neurons in living brains. For the time being, this research is being done on mice and rats. I will let the animatic (hopefully) explain the rest...


I will also be building an interactive simulator for the probe to be housed on a website along with the animation. Starting in January, I'll be in production for this animation.

Merry Christmas!
Stuart

Sunday, November 18, 2012

Metastatic Bone Cancer process

I'm hopefully about ready to start rendering this 2-page illustration for the pathology course. My very first idea was something along these lines:


and it has evolved to this point:


I used maya to construct the rough shape of the rib to get a better perspective view and used it as a template. Booleans were used to cut out windows in the rib, and because the mesh wasn't really getting used for anything itself, I didn't mind that the topology was a mess from the booleans.

Later,
Stuart

Wednesday, October 31, 2012

MRP Teaser

Now that the pre-production for my Master's research project (MRP) is well under way, I'd like to share some of the materials I have created for the project. This is just a teaser to start (storyboard panel). I will explain the scope and content of my project soon, since I don't think I've yet described it adequately.


Later,
Stuart

Monday, October 15, 2012

Metastatic Bone Disease

For the pathology course, initially I was set to do an illustration on leprosy, but for various reasons, it proved to be not the best topic. So I've decided to illustrate Metastatic Bone Cancer, which should be more interesting, comprehensible, relevant, understood, and satisfying as a final product. I've done a couple of tissue studies. As I've been doing research, I understand that there are several aspects of these studies that I will need to correct or improve for the final illustration. But they serve the purpose of trying to understand the tissue and the accompanying visual problems.

This is a perspective view of tissue cubes, showing a metastasis growing over time and eroding the trabeculae.


This is a color study with pencil crayon, showing a rib with associated intercostal muscle and a pathologic fracture.


I also created a series of tutorials in Cinema4D and After Effects for classmates for a group project we're working on. I honestly don't expect anyone to watch all 1hr+ of it, but the first couple minutes of the first one might give an idea of the scope of the tutorial.


Later,
Stuart

Wednesday, September 19, 2012

Fetal Transposition

The first assignment for the Medical Legal class I'm taking this fall was to look at a single view of a fetus and draw it at 90 degrees to the original. Most of the time when trying to understand something in three dimensions, I need at least two views, e.g. front and side. It was really an exercise in filling in the missing information using relationships and shading cues. I decided to try to block out the form in ZBrush to help out with the problem.
This is the original image:  

ZSpheres to figure out where all the limbs go:

And some rough sculpting to flesh out the form:


And the final image with side by side comparison. I didn't follow the sculpt exactly, since there were some points where it wasn't completely successful, and my first sketch attempt was not so great. But this is my second version, and I paid closer attention to the original image, and I think it is a reasonable approximation of a 90 degree transposition.


Well, lots of classes this semester and lots of projects on the go. I should be posting some leprous work soon, a ZBrush vertebra, and perhaps some Unity work in the near future too.

Later,
Stuart

Sunday, September 16, 2012

Model viewer test

Testing out a new site/plugin I heard about on the simply maya forums. Could be kind of cool to share models with. Seems promising. Click and drag around, change the shader to wireframe on shaded, etc.
If the viewer doesn't show up, make sure you're visiting the blog itself on a modern browser.


Later,
Stuart

Friday, September 14, 2012

"Physically Accurate Lighting in mental ray" from Simply Maya


I have the privilege to review a tutorial from Simply Maya called "Physically Accurate Lighting in mental ray". This is a 2.5 hr tutorial designed to get you up to speed on using the physical sun and sky system and other indirect lighting principles to light interiors (and exteriors). The tutorial starts with a solid explanation of linear workflow, which I have heard a lot of enigmatic references to but never had the courage to tackle. While the descriptions and demonstrations of linear lighting and gamma correction far from satisfied all my questions, I now feel like I have enough to go on and I will definitely try to use linear workflow on any future lighting projects. I am also curious to explore Gen's PMM Linear Lighting Buddy plugin.

The goal of this tutorial is to create a lighting setup that can be very easily modified for light at any time of day. As such, physical sun and sky figures prominently. Portal lights, final gather, and global illumination are all utilized to supplement the main lighting provided by PSS. I found the explanations of PSS and portal lights to be more detailed than FG or GI. FG and GI are often described more in many introduction to lighting tutorials.

After setting up the lighting system, the room is textured using mia_material_x and misss_fast_shader2_x exclusively. I found some of the shader connections to be quickly done and confusing, but they ended up being repeated several times, so it becomes clear what is being arranged. There are several good tips and tricks offered to both optimize render time during testing and also improve quality in the final render.

To summarize, this tutorial is not a lighting basics course. It assumes a good understanding of maya's interface and general lighting principles. The main purpose of the tutorial is to take lighting in mental ray to the next level of accuracy and realism. Explanations are well articulated, while leaving room for further study (much like a lecture can be supplemented with textbooks). The final render is rather pleasing, and it is easy to imagine applying very similar workflows to many kinds of projects. I'd highly recommend this tutorial for anyone wanting to explore linear lighting techniques and physically accurate setups.

Thanks for reading.
Stuart

Wednesday, September 5, 2012

Juggling Balls

Spent just a few hours experimenting with a few features in Maya I haven't used much. I like juggling, so I thought to render some juggling balls on a clean white background. Though they look like spheres, I used nCloth to give the balls just a tiny bit of sag and weight. I used image based lighting (IBL) which I'm not sure I'll use much in the future (seems too hard to control), and I added some depth of field (DOF) in PS using a zdepth render pass. DOF in post (PS) is faster than DOF in Maya, but I'd like to experiment more with both of those to see what kind of results they can give.


Maybe I'll call this the "Bad Sketch" Series: #5/1000

Later,
Stuart