Friday, April 24, 2009

Little update

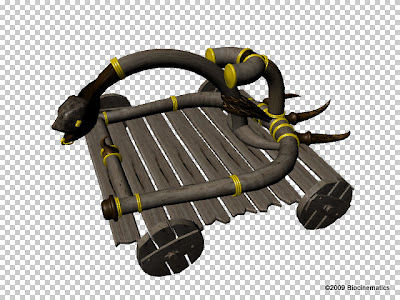
Here's the start of the middle section of the ship that will connect everything together. I've been learning a bit more about render layers and everything, so it looks a bit nicer than some previous renders, I think anyway.

Hopefully my next update will be more substantial.
Later,
Stuart

Wednesday, April 22, 2009

fuel tanks


Here's another part of my ship, the fuel tanks. Once I've got all the parts of the ship modelled, I'll stick them together and you can see the final product. Feels like I've hit a bit of a wall, learning-wise, but I'll try to push forward and keep improving.

Later,
Stuart

Friday, April 17, 2009

Escape pod

Here's a render of an escape pod I'm modelling for the spaceship challenge. I'm learning a bit about rendering, so now I can look more professional in my WIPs.


In other news, I'm going to be starting a process to work out/develop a potential interdisciplinary master's degree for UVic. Wish me luck!
Later,
Stuart

Saturday, April 11, 2009

Spaceship challenge

Sorry it's been a little while since I last posted (I know, you were all on the edge of your seats waiting), but I entered a modelling and texturing challenge on simplymaya.com purely for learning purposes (and to have fun).

I'm posting there more than here, cause people are replying and giving me tips and stuff, so it's really helpful to hear from pros (now you're jealous and insulted... sorry again).

But I'll still post some WIP pics as I go... here's an engine:

Wednesday, April 8, 2009

I wear my sunglasses at night

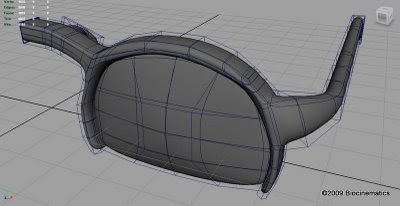
Here's some cool shades:

..or at least a wireframe of half of them. I think the model isn't too bad, but I'd kinda like to spend a few more hours working some detail into them, such as the hinges and nose thingies. I tried out some renders to see if I could get a nice reflective surface.


I'm not very happy with the final product, but I decided that it was quite time-consuming to just tweak settings. I can't figure out why the shadows are so blocky. I tried changing some anti-aliasing settings, as well as shadow resolution (the obvious place to start, I thought), but still not great. I think I need some solid theory/explanation for a large number of the very numerous settings and options. It seems as though the same options appear in several locations as well, such as shadows and illumination for objects, materials, render settings, etc. Lots to learn.

Tuesday, April 7, 2009

Render types

I figured out how to get a series of images into a video format. You may remember that I got Autodesk Cleaner XL shipped with the rest of the software. Well that has the capability to convert an image series into a bunch of different formats, like flash, quicktime, mpeg, avi, etc. Only thing is it doesn't support .iff files either, so next time I do a batch render, I'll be rendering as a tiff or something like that.

I also was able to do some experimenting with maya's different renderers, including mental ray, the hardware renderer, software renderer, and vector renderer. Yes, you heard me, vectorized computer animation. Cool cool.

I won't post any renders, cause there's nothing too interesting, but now I'm officially finished project three in the book. Next up is some more animation as well as some dynamics (rigid bodies and particles and stuff) so I will definitely post some animations when I get there. But first as I promised, I have some sunglasses to model and texture and render. Not really sure how to start on these ones... (loft some curves, NURBS?) I think I'll stick with polygons since that's more what I know. I guess we'll see how it goes.

Later,
Stuart

Motion blurred frog vid

So I've just learned some lighting/rendering techniques. Pretty basic stuff, but good to know. There's a ton (tonne? metric... good band) of stuff I need to learn with respect to lighting and rendering. Especially if I'm going to be simulating microscopic fluid lighting conditions. More on that later.

Here's a lens flare effect:


Not the greatest composition. You can sort of see part of the catapult outside the door. This building/room was what I did for project one of this book. It's sort of a throne room, but I set delgo up to walk out of the door into the bright bright sunlight. Cool. As I write this, I'm running a batch render, so hopefully that'll finish up soon and I can post a little animation. I'll see if I can figure out how to convert a series of images into a postable animation format. Frame 50, ok, here we go...

Alright, well it worked out mostly, but unfortunately I can't find a solution to convert images to video. VideoMach doesn't handle .iff files from what I can see and that converter is what I've used in the past. Oh well, I'll figure something out eventually.
Here's a still from the animation.
Never mind, blogger doesn't support iff either. I'm not going to re-render, so you'll just have to speculate what the animation looked like. (Hint: walk cycle of delgo walking towards the catapult with shadows and a bit of motion blur)

Later,
Stuart

Sunday, April 5, 2009

MacDoonlads (don't sue me)

So in accordance with a recently received challenge, I decided to put together a brown paper bag. This took only a few hours. If I had longer I would have put more work into the crinkles and edges and stuff, as well as the rendering and texturing (so everything really).

I learned quite a bit during this, especially in UV mapping, which is really tricky still, but I'm getting more familiar with the tools and controls, if not exactly learning the best way to approach it yet.

Without further ado...
a brown paper bag with an ominous logo:


I'm not really sure why or what interprets the black background of my render as a transparent checker look, but I'll look into fixing that and producing proper renders soon.

Keep checking back and let me know what I need to fix (or send me challenges),
Stuart

PS Forgot to post a wireframe

Saturday, April 4, 2009

Rigged & Textured Catapult

So here's my rigged and textured catapult.


The texturing wasn't great by any stretch. I'll have to work on that, but it's not as much fun. I've heard from other people too that they don't really enjoy UV mapping, which I didn't do here, but is related. I guess I'll just have to practice up on the whole texturing UV mapping side of things, so that it won't be as painful.

And I realized after I deformed the catapult arm that it won't line up with the little hook like it does perfectly in the book... how was I supposed to know where the bent arm would end up? Ah well, again, just learning the process.

Paint effects are next... cool.
I'll keep you posted.
Stuart

First Render

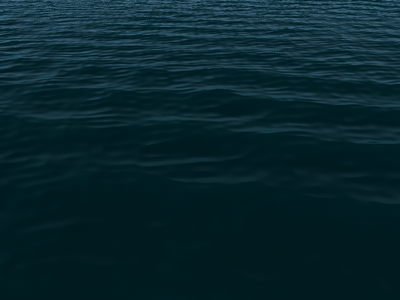
So I've officially installed Maya and run a quick render to test a few things. Here it is:


I know, it's really boring, but I wanted to see if:
a) Maya was working -it is, yay!
b) I had been given access to Maya Unlimited versus Maya Complete -this is a fluid effect (an ocean, if you didn't notice), so I have all the cool features that Unlimited has to offer, yay!
c) there were any watermarks or things on renders to designate it as a student version -there aren't, yay!
d) Maya could cause me to pass out in awe -actually, no it didn't, probably for the best.

So there you have it. I'm up and running. Now should I...
a) start modelling (which I looked up and found out that American has one l and British has two l's... British it is)!!!
b) install Mudbox!!!
c) make bread and do housework :(

Gah...

Later,
Stuart

So it begins...

My parcel has arrived. I have unpacked it. I am now holding 10,000 dollars worth of incredibly powerful software in my hands... (pauses to pick up the five DVDs)
I cycle through them.

Autodesk Mudbox 2009 Student Version. Digital sculpting and texture painting. Similar to what sculptures do with clay, but without the gooey. I am very much looking forward to tackling this with my tablet (Erick, may I request the return of my tablet?).

Autodesk MotionBuilder 2009 Student Version. Real-time 3D Animation Solution. Used in film, games and TV for creating believable character animation and movement quickly. I likely won't use this as much, since I'm not sure what functionality this will have that Maya doesn't that I would be able to take advantage of. It seems as though Autodesk has many software solutions with overlapping applications, which makes choosing between them difficult. This packaged choice wasn't at all difficult, however.

Autodesk Toxik 2009 Student Version. Node-based Compositing Software. Used to layer together elements to create beautiful final images. Looking forward to learning this software to prove that the result is more than the sum of its parts. I may switch over to Adobe's After Effects at some point, but again, I'm not sure the differences in functionality or application, but it can't hurt to learn this first while I have access to it.

Autodesk Cleaner XL 1.5. High-quality Encoding. This is used to convert my output into various formats, such as Quicktime, DivX, M4A (ipod! I think), TIFF images, Flash? Getting my videos into your preferred system. This one was a bit of a surprise as I didn't see it listed in the package components, but it's very neat and I'm sure this will be a welcome addition to the training process.

And finally... drum-roll please

Autodesk Maya Unlimited 2009 10th Anniversary Edition Student Version!!! The most amazing and widely used complete software solution for modelling, texturing, rigging, animating, lighting, rendering and dynamic simulation in the world! Most of the special effects in TV, ads, movies, and video games incorporate this software into their pipelines. This DVD will potentially be the cornerstone of my career. Enough said. Let me get started now.

Until next time (and there will be a next time for sure now),
Stuart

PS If you don't believe me... behold the majesty